Tuesday, March 24, 2015

Change and The Painted Door....


Photo Credit  www.theberry.com 
     'When one Door Closes...Another opens" as tired a phrase as it may be , it is apt. There are a great many opportunities in change, and refusing to adapt to it, quite often, just leaves you on the wrong side of the door.
     I like to look at Change as a catalyst to creativity, How do I adapt what I do to suit these changes , or if they cannot be adapted, how do I change what or how I do things? It's not as scary as you think it is... it can be a lot of fun.  Sometimes you just have to scrap it all and start from scratch, but that can be fun too!  Being intimidated by change is normal, we are always frightened by what we don't know or understand, but the best way to deal with the unknown, is to get to know it.
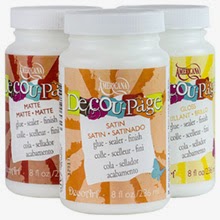
"NEW" DecoArt Media


  New Art and Craft Products are a perfect example, as products in this industry change constantly!
      Knowing  what you are working with and what it's limitations are, is the first step. Dig in , read everything the manufacturer has to say about it's product and how to use it. Look for project sheets, product information, and Tutorials.  Ask other designers, and artists what they do with it, what they use it for, what they recommend.
      Then it's time to get dirty, start playing with it, see how it responds to the brush , to the cloth,to the knife.  Manipulate it, colour it, wash over it, push it through stencils , stamp with it, stamp on it, freeze it, thaw it, spray it, TRY anything with it! Do a hundred sample boards with it, see what makes it work and what makes it fail. When you do these things  you will clearly see the potential in a product as it applies to your work. Not only that, you will have a clear understanding of what the product is capable of.
     All too often artists won't attempt things with a new product because " I don't want to waste it"........ it IS wasted if all it does is sit on the paint rack. If you learn something from it while playing and experimenting , it has NOT gone to waste. Even if what you learned , is that it isn't for you.
     Trying out new Products in your  design work can have a positive and rejuvenating effect, on both your work and on your attitude. We can often get a little bogged down and uninspired , adding a twist to what you already do, can often be just what the DR Ordered to put the spring back in your brushes.

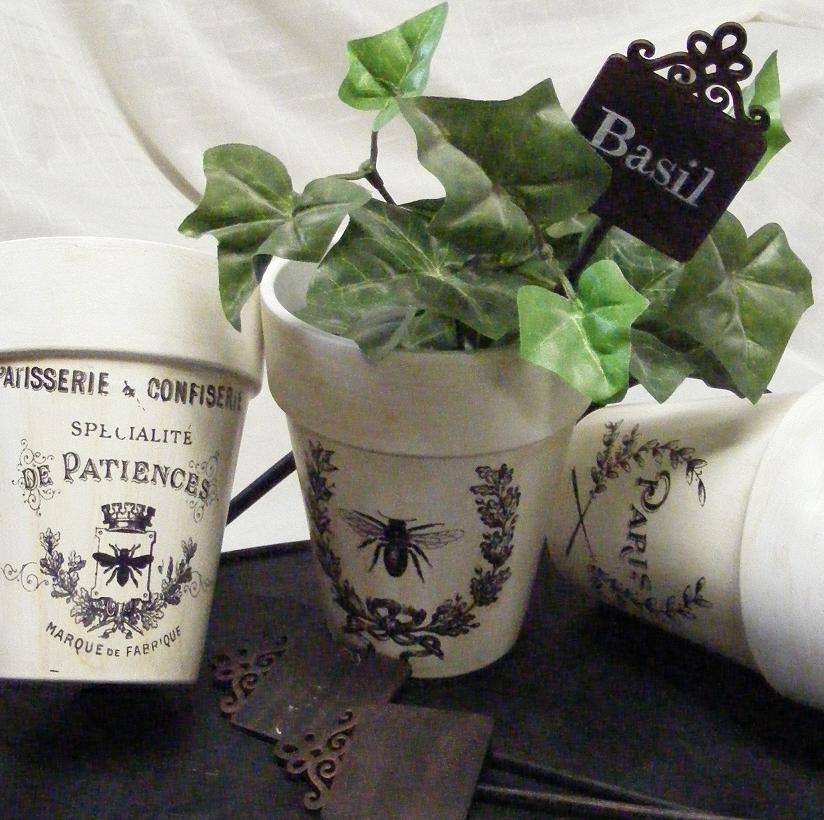
Photo Credit Tracy Weinzapfel Studios 

      You want a twist?? You have to Check out Tracy Weinzapfel Studios....Here is an artist that just runs with it!!
     She is utterly fearless when it comes to playing with product. She has tremendous creativity and a go for it attitude when it comes to change. She has a very positive approach with a  colourful personality and exudes confidence ! All of those attributes are reflected in her work! It's colourful, vibrant and dynamic and above all it's FUN!

Utilizing and capitalizing on the change within the industry and with product, is essential to a fresh take on your artwork. We creative types get bored easily...as is evidenced by the STASH of STUFF that we have collected. I for one will have to live to 125 to paint and paint with  everything I have accumulated , and thats assuming I Don't accumulate more in the mean time.

Change to this industry  with Shop Closures, and The minimization of the Big Boxes in the last decade has brought us  to Web Ordering for supplies, to Video Tutorials right at home via You Tube and Streaming Sites. It has brought us to E Patterns and E Zines. Blogs and Online courses , things that didn't exist  just 10 yrs ago. It has opened up the WORLD to us as designers and painters. Change... Is a good thing , if we embrace it's potential.

When One door Closes....it gives you the opportunity to paint the other side of the door .


Monday, March 16, 2015

You are NOT a great painter....

  You are NOT a great painter......

    An Artist I admired greatly once  told  me that.... and at the time he was right,  a little insensitive to the feelings of a 12 year old girl, but right none the less. It was not followed up with a BUT or any positive comment to take the sting out of it either.  As devastating as it was to hear  it, he was right.. I wasn't a great painter....I'm still not a great painter....YET.

   I hear students say things like  " Oh I can't  paint like you." .. or.."  I can't do that". How about we begin ending that statement with "YET". It would be closer to the truth and far more beneficial to you.  I can't paint like you... YET!  or I can't do that... YET! Did you believe that you could ever paint the way you do now?? Probably Not , but here you are.

   Artists are our own worst critics, we see every flaw in our work, because we are trained to see it, and it drives us batty! I know for myself I see every crooked line, every wonky float, and imperfect stroke. I know that the shadow on the right should be one value darker I know that the highlight on a few of those grapes is not quite right, and it stands out to me, like a bear on a bicycle! it might as well be waving a flag and singing the Star Spangled Banner. Oddly... none else seems to see it. but it is these imperfections ( real or imagined) that drive us to perfect our skills.
The confidence we gain as we improve, is at times, imperceptible, but it  grows... slowly, but it grows.

Growth to an artist is vital, without stretching ourselves, we stagnate. The work becomes nothing more that a rehash of our previous efforts, and we become lethargic and careless. So to alleviate this we try a new colour, a new surface, a new design, a new brush or technique. We advance our skills, we take up coloured pencils, watercolour, oils, mixed media, we try stencils or stamps, or texture mediums, and we venture away from where we started. sometimes wi come full circle, other time we don't, and go wandering down another path to see whats there! After all   It is not the arrival that is the important part of this  journey.. it is all of the stops along the way that make the trip worth while.  Take the classes , try new things, Go to conventions, indulge in the joy of being with others that have the same passion for Art as you do, Practice the one thing that eludes you, buy new brushes, pencils, canvas and ink because you need to try it, because  you are Not a Great Painter......Yet.

Saturday, March 14, 2015

Faux Cloisonne.....Mixed Media goes Old School.

Parfumerie Paris ( Faux Cloisonne Pitcher)
Faux Cloisonne.....Mixed Media Goes Old School!

I use a Faux version of the Original  Cloisonné , to create a dramatic contrast in Sheen levels , to highlight distinct elements of an overall design. it's fun, it's easy and it works to great effect!

The real deal however is far more involved.  There is a more detailed description of the process towards the end of this post.
for now , I will walk you through the Faux Version technique ... It's Easy Peasy!


With the Advent of all these Mixed media Products, it it so very easy to create some really awesome effects with very little effort!
You need a dimensional Paint like Paper Effects ,  Liquid Glass, Paper or paint of choice or both.. I opt for both. You can also embed things into this, like seeds, beads, dried flowers etc.. so go wild..lol

The first thing you have to do is paint the picture, it doesn't have to be overly detailed , just get the shading and highlighting in, nothing too over the top though. But if you are a slave to details , go ahead , put em in, you'll still see them.
Faux Cloisonne Detail


Once everything is painted, Glued Down ( Whatever your doing) use a fine point on the Paper Effects and outline each segment of the design you want to highlight. ( as in the piece in the Photo... The Floral element has every petal and segment of the floral outlined.) This just creates a barrier of sorts to prevent the Liquid Glass  from running everywhere.

Once the Paper Effects  is dry, the spaces are then flooded with  Liquid Glass. It will look a little milky at first but it will dry crystal clear and glossy . You can embellish it while wet, by adding beads, Glitter or Seeds for additional Dimension. ( You can put charms , gears, just stuff... under this medium.. ( Looks kind of like an resin finish.)

When completely Dry the effect is quite stunning. The Contrast between the Matt background and the High Gloss elements is striking! The Liquid Glass also enhances the colours underneath , giving them a little extra Vibrancy.

So Imagine:  Use Scrapbook paper or Gift Wrap or Family photos, to create the various parts of the design , then Use this technique to enhance them and make them the Primary focus of the overall design. Use stamps to create pattern, Stencils to create texture.. yes I said texture... it looks AMAZING under the Liquid Glass!! You can do almost anything and it looks Great!!
Faux Cloisonne Rose Handbag


Oh My Oh My The MIND BOGGLES!!

Give it a shot, break out some sample boards and go to it.... TRY IT!! You never know how things will look until you try it!
I probably do 5 to 10 sample boards when every time I try out a new technique.. just to see what I can do with it! If I fail, So what.. try again using a different colour, background, or paper, add stamps , or stencils, or dried flowers.. You just never know what you will come up with, and THAT is when it is the most fun to play in my sandbox!!

So now comes the educational part... below I have soured some information about the Real Cloisonné.. just FYI.

If you are looking for patterns or designs using this technique,Visit my website at www.tracymoreau.net.
Simple Faux Cloisonne Detail

 The Cloisonné Process:

Cloisonné was first developed in the Near East. It spread to the Byzantine Empire and from there along the Silk Road to China. Chinese cloisonné is arguably the most well known of all the varieties of cloisonne and enamel making. Russian cloisonné from the Tsarist era is also highly prized by collectors. Chinese cloisonné is sometimes confused with Canton enamel, a similar type of enamel work that is painted on freehand and does not utilize partitions to hold the colors separate.
The Process
The artist forms metal (such as copper, bronze, or silver) into the shape of the finished object. The material usually used for making the body is copper, since it is easily hammered and stretched.
Filigree-soldering. which is pure silver wire usually about .010 x .040 inches in cross section, is bent into shapes that define the colored areas. The bends are all done at right angles, so that wire does not curve up. This is done with small pliers, tweezers, and custom-made jigs. The cloisonné wire pattern may consist of several intricately constructed wire patterns that fit together into a larger design. Solder can be used to join the wires, but it causes the enamel to discolor and form bubbles later on. Instead, the base metal is fired with a thin layer of clear enamel. The cloisonné wire is glued to the enamel surface with gum Tragacanth. When the gum Tragacanth has dried, the piece is fired again to fuse the cloisonné wire to the clear enamel. The gum Tragacanth burns off, leaving no residue.
Enamel-filling. The basic elements of enamel are boric acid, saltpetre and alkaline. Due to the difference in the minerals added, the colour differs accordingly. Usually one with much iron will turn grey, with uranium, yellow, with chromium, green, with zinc, white, with bronze, blue, with gold or iodine, red. In time of filling, all the colours, ground beforehand into minute powder and contained in plates, are placed in front of the workers and are then applied to the little compartments separated by filigree.
Enamel-firing. This is done by putting the article, with its enamel fillings, to the crucible. The enamel in the little compartment will sink down a bit after firing. That will require a refilling. This process will go on repeatedly until the little compartments are finally filled.
Polishing. Some pieces of hard carbon are used for polishing to produce some lustre on the surface of the article.
Gilding. The article is placed in fluid of gold or silver. The exposed parts of the filigree and the metal fringes of the article will be smoothly and evenly gilded. Alternatively, the exposed metal is electroplated with a thin film of gold to prevent corrosion and to give a pleasing appearance.
The above information was sourced from Wikipedia, it has not been edited in any way, and is believed to be accurate in content.


Monday, March 9, 2015

I am Stuck on Decoupage!


 This is a very old art / craft form. There are examples dating back prior to the Victorian era, and further. Those days they used Hide glues and lacquers, or Shellac. but today we have some wonderful product for this Fun technique.
for Years Mod Podge was the Industry standard but Now  DECOART has raised the bar and produced an exceptional line of Decoupage products for nearly every imaginable surface.


DecoArt Decoupage 
Traditional Decoupage mediums often dried a bit tacky, but the DecoArt Products dry to a smooth non sticky finish that allows you to use it Not just an adhesive but also as a sealer and finish. With three sheen levels available , Matt, Satin and Gloss. You have a sealer and finish for every application.

There is also a Glitter version for special projects  that need Sparkle, An Indoor outdoor version for All weather applications, an antique version with a slight tint to create age when needed, One for Napkins and thin papers, one for paper to paper application and one for fabric and wearables. The Versatility of this product line is further advanced with the Addition of A dishwasher safe version.

Decoupage is an art from in and of itself, and though the idea of cutting out pretty elements and gluing them onto a surface, seems pretty simple , there are a few tips to doing it well.

You Need:

Scissors:
With a fine point and very sharp. There is such a thing as Decoupage Scissors, but a pair of embroidery scissors will do too.  For a great pair ...visit  Westcott They have a great selection.. My favourite is the Titanium Bonded 4" Pointed scissors. ( I have several pairs of Westcott scissors in Various sizes)


Your Choice of Decoupage:
My favourite General Purpose one is the Decoupage Matt, but I have them ALL.. cuz ya just never know when you'll need it.


Paper:
DecoArt has made a wonderful Line of Decoupage Papers to add style and panache to your projects,  but you can use napkins , news print, Tissue paper.... whatever. It'll stick and make it pretty.  Also great for Mixed Media and other artwork. They also have some with a Metallic foil. for a little glam!


Ya Need A Great Brush:
Something soft enough to create a smooth finish , but stiff enough to move the medium around. I use A Dynasty Faux Squirrel 3/4 Flat or a Dynasty Faux Kolinsky 3/4 flat wash. both will work beautifully. " THE BRUSH GUYS" Have My favourite Brushes


 Step1: Trim the paper to fit the size of the piece you are working on, unless it is only an element of design then trim tightly to the edge of the design .


Step2: Apply a generous but even coat of the Decoupage to the surface, only in the area that you are applying the paper to.


Step3: Use a brayer or the decoupage bottle to firmly seat the paper into the medium. Rolling it will also remove any excess medium and any bubbles that may be under the paper.

Step 4: Allow it to dry before covering the paper with a thin coat of the decoupage medium. Let it dry and you are ready to add your own embellishments to finish your creations.

Step 5: If you have paper exceeding the edge of the surface you are working on, Sand the edges with a singing sponge. Down and away.. Press down with the sponge on the top edge and sand down. and away for the surface . the aper will wear along the edge of the surface , giving you a nice clean and perfect finished edge.


There is nothing to stop you adding paper in layers.. add different colours, textures and designs for variations and fun detail.

Dig out your stamps , stencils and other fun things to add dimension and interest to your piece.. HAVE SOME FUN WITH IT!!

Don't forget to think outside the box, you can use decoupage medium to do Image transfers, add dried flowers to cards, adhere embellishments or to seal and protect your work.

Image Transfer Technique using Decoupage!

Have you got a great Use for decoupage or a fun project I deal?? Lets Hear it!!


Sunday, January 6, 2013

The Kitchen Cabinet redo... DONE!!

Well it's all done.. The Cabinets are all painted, textured and doors are rehung and hardware repainted and installed...And I LOVE it! My kitchen has a fresh and bright feel with a little touch of elegance that I felt it needed. Although as usual, when remodeling we discovered a few new problems.... My Dishwasher and my Fridge... no longer work. The dishwasher still does dishes and the fridge still refrigerates.. but they both clash with the new decor...SIGH! Oh Well I will have to keep my eyes peeled for a sale on a stainless dishwasher and a matching fridge.( hmmmm.. I wonder if I can Paint my fridge Stainless S teel......)


Before!

After!!

I took this shot at an angle so you can the the relief clearly. I just love the results!
We have since added a hanging Pot Rack , and laid a new floor as well. Add to that the wonderful Butcher block board I received at Christmas and I have all I need for my Little kitchen!
All thanks to a Wonderful DYI kinda Guy for a Hubby!!

Tuesday, June 5, 2012

Painted Herb Pots and Pokes

I had a dear friend visit with me for the day.. we had a blast Painting My Herb Pots and making Plant Pokes... We did a lot of giggling. K Found humor in a number of things about this project.. not the least of them being my doing anything to do with Plants. K was born with two green thumbs while I am sporting two brown ones. No one with any sense would ever accuse me of being botanically inclined, believe me. I give the word Herbicide a whole new meaning.

I am botanically challenged **Admitting you have a problem is the first step** but lets put that aside for a bit and get on with the project at hand.. These lovely Herb Pots and pokes.

You will Need:
1:From the Garden Center: You will require three Terra Cotta Rose Pots, I used the medium sized variety... Don't ask me what size they are... Oh wait!... the size is on the tag that was stuck to the bottom... they are 6 inch pots and 4 inch saucers.
Three Herbs.... of your choice.. I Have not selected my victims, I mean plants as yet.

2: From "www.decoart.com":
Deco Art All purpose Primer sealer,Warm White Paint,DecoArt Decoupage Medium (Matt), Asphaltum paint, Duraclear Satin or Matt Varnish ( as per your preference)Deco Art Chalk Board paint.

3: From "www.graphicsfairy.blogspot.ca"
Three vintage graphics, Reversed (Only if Text or numerals are involved)

4: From "www.Stockade.ca" you will need:
3x 2inch square scroll tags

5:Dynasty Faux Squirrel Brushes:
3/4 flat, #2 Round, #2 Rigger

6: Misc:
Shop Towel, Water, White Graphite paper, Printed lettering ( Thyme, Basil, Parsley etc), L'Acrobate Glaze.( www.tracymoreau.com)

To Start: Mix Warm White paint 1:1 with some All Purpose Primer sealer. Mix well. Begin by applying a generous coat to the INSIDE of each pot. If you want the paint on the outside to remain in good shape over time, you have to seal the ENTIRE Pot inside and out, to prevent moisture from getting behind the paint. Set them aside to dry. Terra Cotta is VERY porous, so it will dry pretty quick. Then apply a coat to the outside of each pot. The sealer makes the paint a bit transparent, so three coats will likely be required to get good coverage.We are looking for a nice opaque coat. Let dry thoroughly ( I put mine under the fans for about 1/2 an hour.. that seemed to do the trick.)


Once the pots were dry I Cut out the reversed Image as close to the edge of the image as i could get and adhered ( Face Down) them to each pot with a generous coat of Decoupage Medium. I did NOT apply any OVER the the image, I just used it to stick the paper to the pot!I put them back under the fans for a bit to dry the decoupage medium well before the next step.
I then used a terry cloth face cloth to gently scrub the paper off the pots, leaving the Transferred image on the pot.


Once all the Paper has been scrubbed off, let the pots dry for a few minutes before applying a coat of the decoupage medium over the entire pot, just to seal the image on.Let it dry Thoroughly.


Use a Little Asphaltum Paint thinned with L'Acrobate to apply a weak layer of antiquing over the White paint. Let them dry thoroughly.

I Used some Deco Art Chalk Board Paint to base the Small tags and the Skewers,I traced the lettering onto the tags and then used the #2 Rigger to paint the lettering with Warm White then I glued the skewer to the back of the tag with a glue gun! You Can just leave them Blank and use chalk to write in whatever you like!!

I grabbed a handful of foliage out of the Silk Arrangement(and Yes I know it's NOT Basil) on my China Cabinet to add a little colour ( I Told you I haven't selected my victims yet) and stuck in the Plant poke... And Voila!! Perfectly Pretty Herb Pots and Pokes!!


If you want to see a step by step demo of this image transfer technique.. here it is:

Tuesday, April 3, 2012

Relief Stencilling Your Kitchen Cabinet Doors.

If you ever wondered how to update your cabinetry , within a budget and end up with something that you can live with for a long time to come.... I have the answer.it takes a few steps , but in the end it will have been worth it. This is the beginning of our Kitchen makeover, we'll post more as we go...for now this is just the first step.

step 1: Convincing your husband that Painting those tired 80's oak cabinets is the best idea to refresh your Kitchens appearance .... it's easy to accomplish, call in three of the most expensive cabinet makers in town to quote you on your "Refreshment Project"... Hubby's reluctance to "Paint Good Wood" will rapidly disappear.

Step 2: DO NOT allow hubby to select the paint colour, but you must drag him to Home Depot, and ask for his opinion and reject each one until he reaches the colour you prefer.

Step 3:Once you have hubby select the sample that you have clearly indicated as your choice. Come to a mutual understanding that your choice is quite obviously the best one, and congratulate him on his excellent taste.

Step4:Pack Suitcase.

Step:5 Before leaving for your SPA weekend with the girls,:make a list to remind hubby to remove all the hardware, clean, sand and prime the doors and boxes of all the cabinetry, and apply three coats of your colour choice to the lower cabinets, while you are away.


Step 6: Enjoy facial, Massage, manicure and pedicure, then dinner with the girls. Drink wine. Email hubby for update on his progress.Ask for pictures.

Step 7: Show pictures to the girls, Respond to email with compliments from Girlfriends, thank girlfriends with more wine.

Step 8: Enjoy final day at the Spa and celebrate the progress in your kitchen with more wine with Girlfriends. Return home.

Step 9: Now That the hard work is done ...it is time to do the pretty stuff.We have chosen to do a stencil relief on the center panels of the Upper cabinets.So we tested the Finish on an old door, but a piece of MDF will work too.


Pictured above are the materials that I used for our Kitchen cabinet redo.... A little texture Stucco.... my favorite stencil... and "Hubby" Primed Cabinet doors. I used one of my favorite palette knives but , if your more comfortable with a taping knife than by all means use it!

Step 10:Start by taping your stencil in place on the primed surface,( a small piece just to hold it steady) then using the knife, apply a thin coat of the Stucco over the image of the stencil. Carefully remove the stencil and let the stucco dry before repositioning the stencil. Repeat this for each door and allow it to dry well.

Step 11:Lightly Sand the stencil relief to remove any sharp or loose bits, and to smooth out any rough edges. The Stucco is very hard when dry so you can be fairly aggressive with the sanding.

Step 12:Have Hubby Apply two to three coats of Your colour of choice over the relief letting ech coat dry thoroughly before applying the next.


Step 13: Have hubby Spray the existing hardware with a metal paint, the colour of your choice. Encourage hubby by reminding him that this team effort will be worth it!!

Fortunately for me , My husband has a sense of humour and enjoys DIY as much as I do...We'll post more as the cabinets are completed but thought you might enjoy this quick tutorial.
Thanks for playin in our sandbox!!

Tracy and Chuck

Monday, March 26, 2012

Spring is sprung
Da grass is riz
I wonder where dem boidies iz
Da little boids is on da wing
Ain't dat absoid
Da little wings is on da boid

Ogden Nash but most Likely Anonymous ( there seems to be some confusion as to the author)

Spring and fall are my favorite seasons... Fall with it's rich colours and crisp air,while But Spring...Now spring is full of promise and renewal.
Both seasons heavily influence my artwork. I was feeling springy today, even though it feels like January with the cold wind and the flurries today. I wanted colour, and fun and these fun tags just did the trick!
After so much traveling the past few weeks it was a pleasure to just sit and paint something fun and easy!
These will be on my site as well as available from Viking Woodcrafts, ( http://www.vikingwoodcrafts.com )and Dynasty Brush. ( http://www.dynastybrush.com ) Enjoy!


Thanks for playin in my sandbox! Tracy