This is a very old art / craft form. There are examples dating back prior to the Victorian era, and further. Those days they used Hide glues and lacquers, or Shellac. but today we have some wonderful product for this Fun technique.
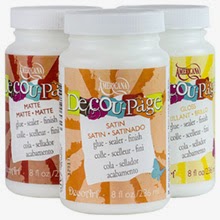
for Years Mod Podge was the Industry standard but Now DECOART has raised the bar and produced an exceptional line of Decoupage products for nearly every imaginable surface.
 |
| DecoArt Decoupage |
There is also a Glitter version for special projects that need Sparkle, An Indoor outdoor version for All weather applications, an antique version with a slight tint to create age when needed, One for Napkins and thin papers, one for paper to paper application and one for fabric and wearables. The Versatility of this product line is further advanced with the Addition of A dishwasher safe version.
Decoupage is an art from in and of itself, and though the idea of cutting out pretty elements and gluing them onto a surface, seems pretty simple , there are a few tips to doing it well.
You Need:
 Scissors:
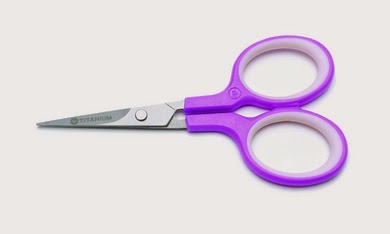
With a fine point and very sharp. There is such a thing as Decoupage Scissors, but a pair of embroidery scissors will do too. For a great pair ...visit Westcott They have a great selection.. My favourite is the Titanium Bonded 4" Pointed scissors. ( I have several pairs of Westcott scissors in Various sizes)
 Your Choice of Decoupage:
My favourite General Purpose one is the Decoupage Matt, but I have them ALL.. cuz ya just never know when you'll need it.
Paper:
DecoArt has made a wonderful Line of Decoupage Papers to add style and panache to your projects, but you can use napkins , news print, Tissue paper.... whatever. It'll stick and make it pretty. Also great for Mixed Media and other artwork. They also have some with a Metallic foil. for a little glam!
Ya Need A Great Brush:
Something soft enough to create a smooth finish , but stiff enough to move the medium around. I use A Dynasty Faux Squirrel 3/4 Flat or a Dynasty Faux Kolinsky 3/4 flat wash. both will work beautifully. " THE BRUSH GUYS" Have My favourite Brushes
Step1: Trim the paper to fit the size of the piece you are working on, unless it is only an element of design then trim tightly to the edge of the design .
Step2: Apply a generous but even coat of the Decoupage to the surface, only in the area that you are applying the paper to.

Step3: Use a brayer or the decoupage bottle to firmly seat the paper into the medium. Rolling it will also remove any excess medium and any bubbles that may be under the paper.
Step 4: Allow it to dry before covering the paper with a thin coat of the decoupage medium. Let it dry and you are ready to add your own embellishments to finish your creations.
Step 5: If you have paper exceeding the edge of the surface you are working on, Sand the edges with a singing sponge. Down and away.. Press down with the sponge on the top edge and sand down. and away for the surface . the aper will wear along the edge of the surface , giving you a nice clean and perfect finished edge.
There is nothing to stop you adding paper in layers.. add different colours, textures and designs for variations and fun detail.
Dig out your stamps , stencils and other fun things to add dimension and interest to your piece.. HAVE SOME FUN WITH IT!!
Don't forget to think outside the box, you can use decoupage medium to do Image transfers, add dried flowers to cards, adhere embellishments or to seal and protect your work.
Image Transfer Technique using Decoupage!
Have you got a great Use for decoupage or a fun project I deal?? Lets Hear it!!


Always informative and always INSPIRING my friend! :D :D :D
ReplyDeleteThank you Sandy, You are pretty inspiring yourself!!
DeleteTracy,
ReplyDeleteCan you paint a design over the paper or use colored pencils?
Ramona.. You can paint directly over Decoupage Matt quite easily, I haven't tried coloured Pencils.. But what a great Idea!!
ReplyDelete